

.png)
.png)


HubSpot CMS is a powerful and flexible platform that enables businesses to efficiently build and manage websites. With its user-friendly interface, seamless integrations, and robust customization options, HubSpot is a top choice for both marketers and developers. While HubSpot provides pre-built themes and templates, creating custom themes and modules allows businesses to design unique, fully branded experiences with greater flexibility and improved performance. Developing a custom theme in HubSpot CMS gives complete control over website design, functionality, and branding elements. Custom modules further enhance scalability by enabling reusable components and streamlined content management. Whether you're a developer aiming to build dynamic, feature-rich pages or a marketer focused on enhancing user engagement, understanding how to create custom themes and modules is essential.
Step 1: Understanding HubSpot CMS Themes and Modules
Before diving into development, it's crucial to understand how themes and modules work within HubSpot CMS.
What is a HubSpot CMS Theme?
A HubSpot CMS theme is a collection of files that define a website’s design and functionality. It includes:
- Templates: Pre-designed layouts for pages, blogs, and system pages.
- Modules: Customizable components like buttons, forms, and sliders.
- CSS & JavaScript: Styling and interactive elements.
- Global Theme Settings: Site-wide configurations for colors, fonts, and more.
Custom themes provide greater control over branding and user experience compared to pre-built options.
What are HubSpot CMS Modules?
Modules are reusable content blocks that add dynamic functionality to a website. HubSpot offers:
- Default Modules: Built-in components such as images, rich text, and forms.
- Custom Modules: Developer-created components tailored to specific needs.
Combining custom themes and modules allows for a flexible, scalable website.
Step 2: Setting Up Your Development Environment
To develop custom themes and modules, set up your local environment with the necessary tools.
1. Prerequisites
Ensure you have:
- A HubSpot Developer Account (Sign up at HubSpot Developer Portal)
- Node.js (Latest LTS version recommended).
- A Code Editor (VS Code is recommended).
- HubSpot CMS CLI (Command Line Interface).
2. Installing HubSpot CMS CLI
The CLI enables interaction with your HubSpot account for uploading files and managing themes.
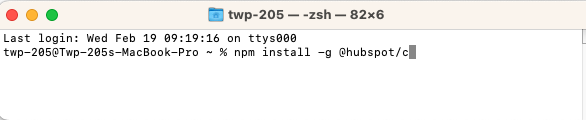
Step 1: Install the CLI
Open your terminal (Mac/Linux) or command prompt (Windows) and run: npm install -g @hubspot/cli
Step 2: Authenticate with HubSpot
Once installed, connect the CLI to your HubSpot account: hs auth .Generate authentication for a HubSpot account using a personal access key.If you already have a hubspot.config.yml file you can use this command to add credentials for additional accounts.

Follow the on-screen instructions to log in and authorize your account.
3. Connecting Your Local Project to HubSpot
After authentication, link your local development environment to your HubSpot account: hs init
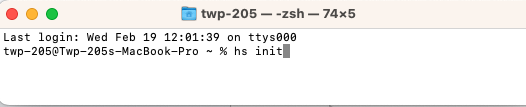
This command will prompt you to select your HubSpot account and create a local configuration file (hubspot.config.yml).
4. Setting Up a Local Development Project
Step 1: Create a New HubSpot Theme
Generate a theme boilerplate using: hs create theme my-custom-theme

This will create a folder structure with all the necessary theme files.
Step 2: Navigate to Your Theme Directory
Move into your theme folder: cd my-custom-theme
5. Uploading and Syncing Files with HubSpot
To deploy your theme to HubSpot, use: hs upload my-custom-theme my-hubspot-theme
For real-time changes, enable automatic file syncing: hs watch my-custom-theme
This ensures that any changes you make locally are immediately reflected in your HubSpot account.
Step 3: Structuring Your Custom Theme
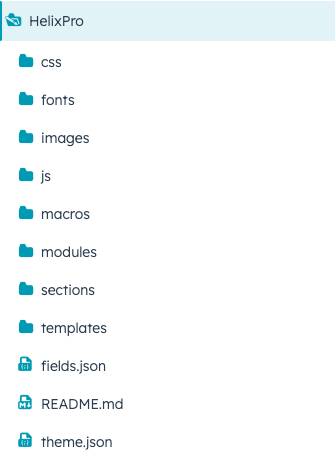
Structuring your custom theme is a crucial step in ensuring scalability, flexibility, and ease of maintenance. Here's how you can organize your HubSpot theme efficiently:
1. Define the Folder Structure
A well-organized theme should follow HubSpot’s best practices:
2. Set Up theme.json
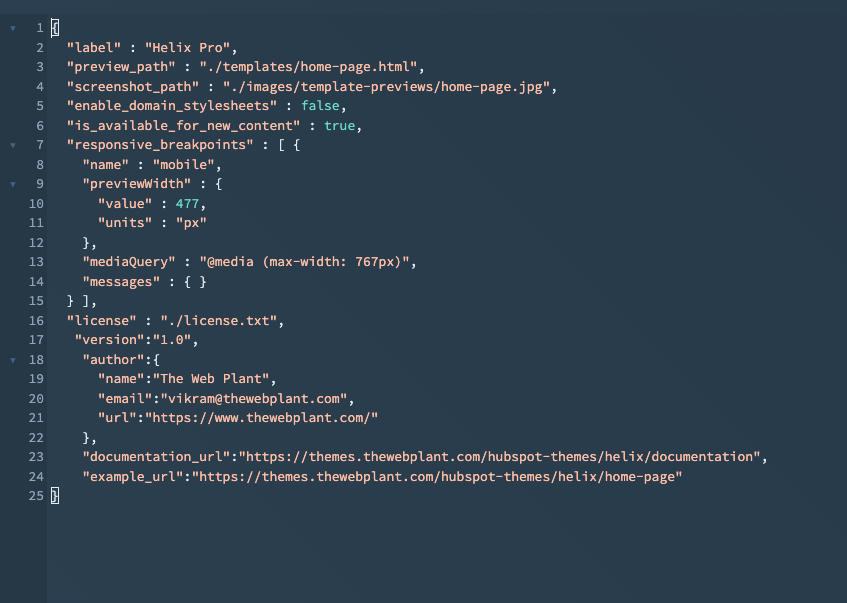
3. Configuring Theme Override Settings
Theme override settings allow users to customize specific design and functionality options without modifying the code. These settings are defined in the fields.json file and appear in the HubSpot Theme Editor.
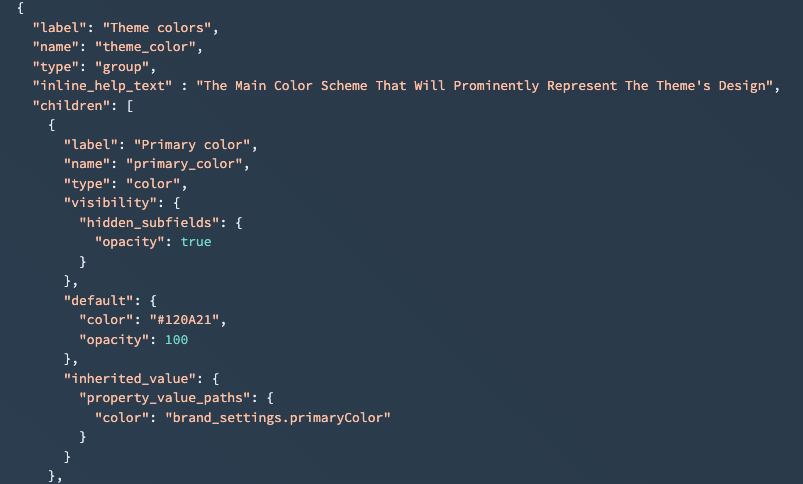
1. Open or Create fields.json
In HubSpot, fields.json is a configuration file used in custom themes to define styling options that control the look and layout of a website. It allows developers to set up customizable fields—such as colors, fonts, spacing, and more—that appear in the Theme Settings panel. This makes it easy for marketers and content creators to update the design without needing to touch any code.
By using fields.json, developers can create flexible, brand-friendly themes that give non-technical users control over page styling. These fields can be accessed in templates and stylesheets using HubL variables (e.g., ), ensuring a consistent design across the site.
Overall, fields.json helps bridge the gap between code and content, making HubSpot themes more adaptable and easier to manage.
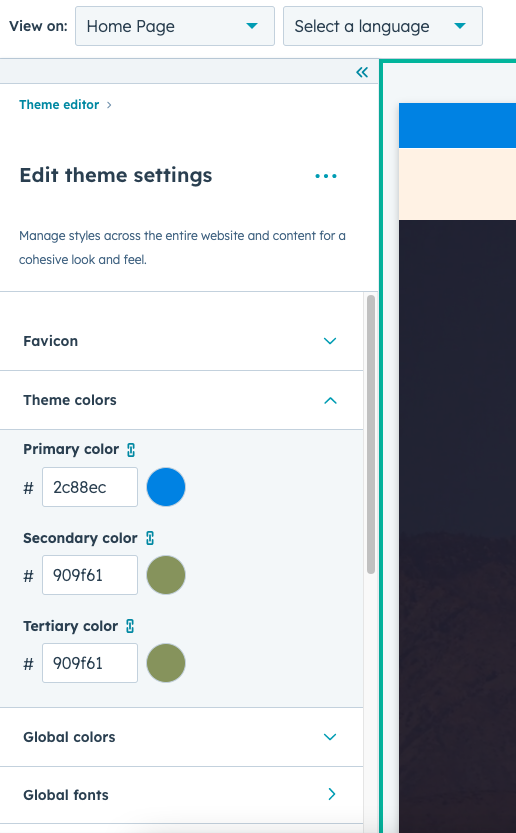
2. Define Theme Settings
Theme Settings in HubSpot refer to the customizable design options available within a HubSpot theme that allow users to control the overall appearance of their website without editing code. These settings are defined in a file called fields.json and are presented in a user-friendly panel inside the page editor.
Theme Settings typically include options for:
- Colors (e.g., primary and secondary brand colors)
- Typography (fonts, sizes, weights)
- Spacing (container, padding and margin)
- Button styles
- Other visual elements
These settings are made available using HubSpot’s design tools and can be dynamically accessed in templates and CSS using HubL variables like .
Theme Settings help maintain visual consistency across all pages and empower marketers and content creators to make style changes without relying on a developer.
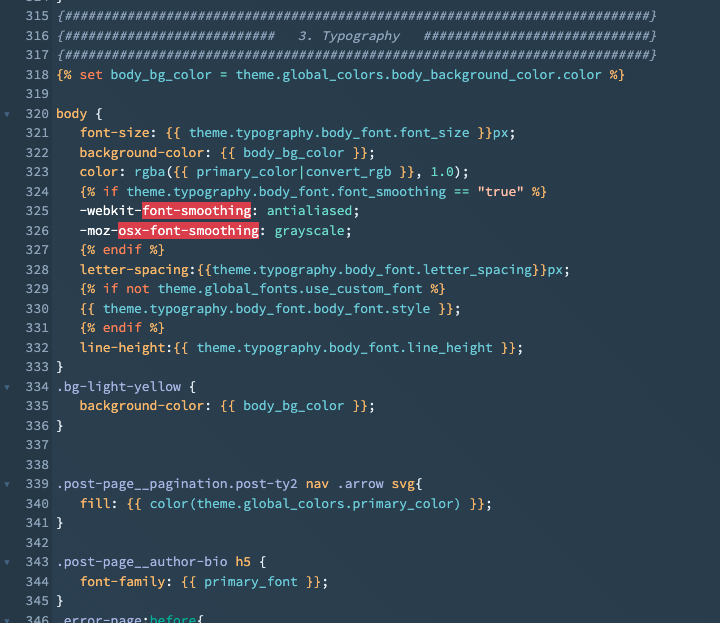
4. Reference the field in your CSS
themeoverride.css is a special optional CSS file in a HubSpot theme used to override default theme styles with custom or specific styling rules. It allows developers to make adjustments to the theme’s appearance without directly modifying the core CSS files, helping maintain clean code separation and easier theme updates.
When included in a theme, this file is typically loaded after the main theme styles, giving it higher specificity. That means any CSS declared in themeoverride.css can effectively override conflicting styles set earlier.
This file is useful for:
- Quick style customizations
- Fixes for specific modules or templates
- Overriding global styles in a manageable way
5. Create Templates
A template in HubSpot is a layout file that defines the structure and design of pages, emails, or blog posts. It can include drag-and-drop areas, modules, global elements (like headers/footers), and uses HubL (HubSpot Markup Language) to render content.
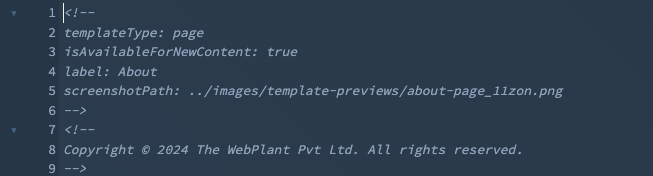
Templates dictate the structure of pages, blogs, and system layouts. Use templateType: "page" to define reusable layouts.
5. Develop Global & Custom Modules
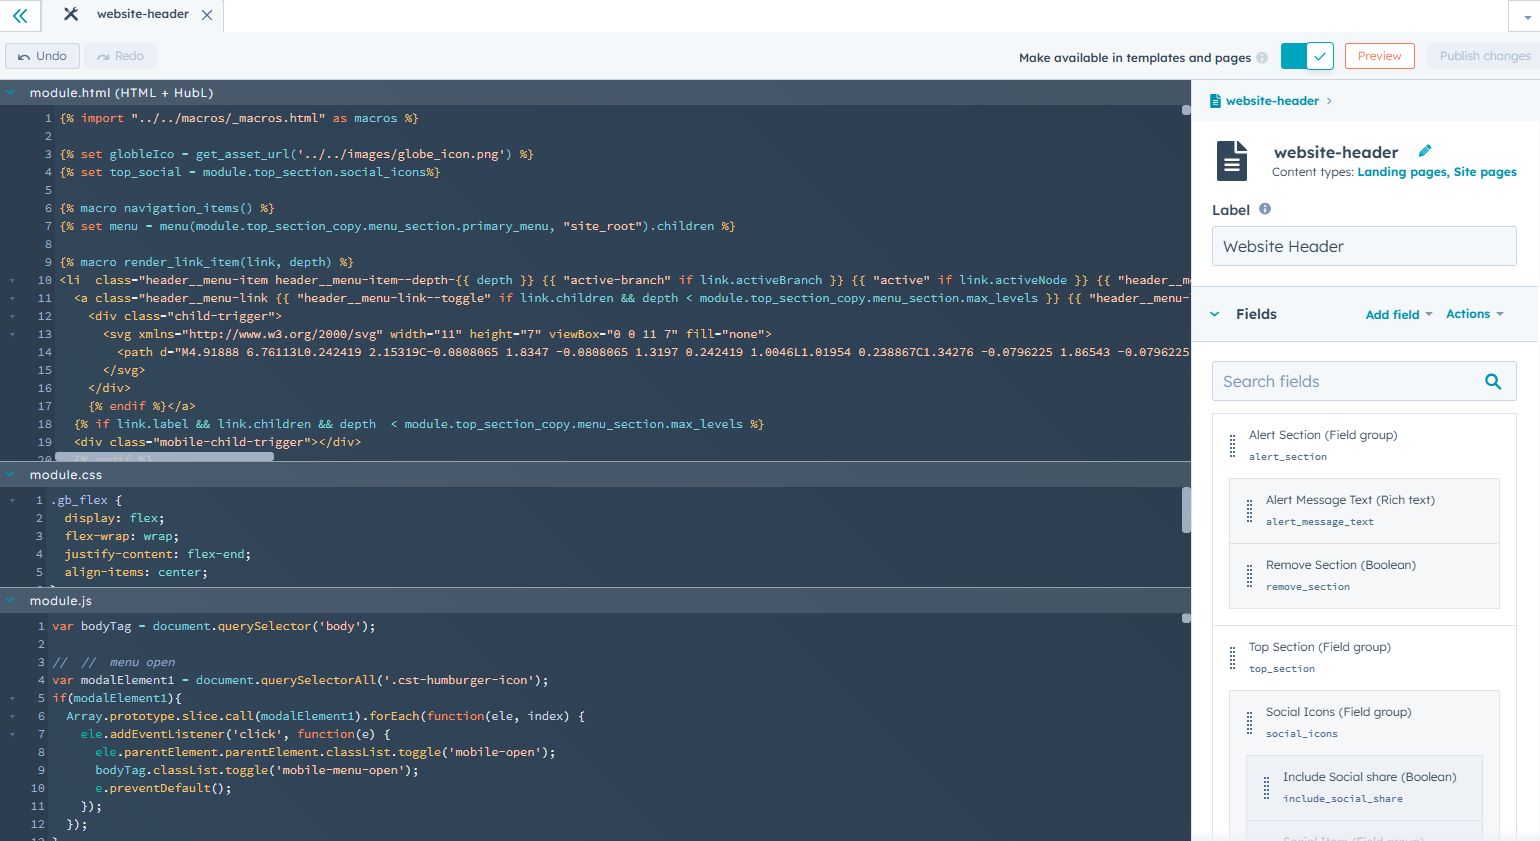
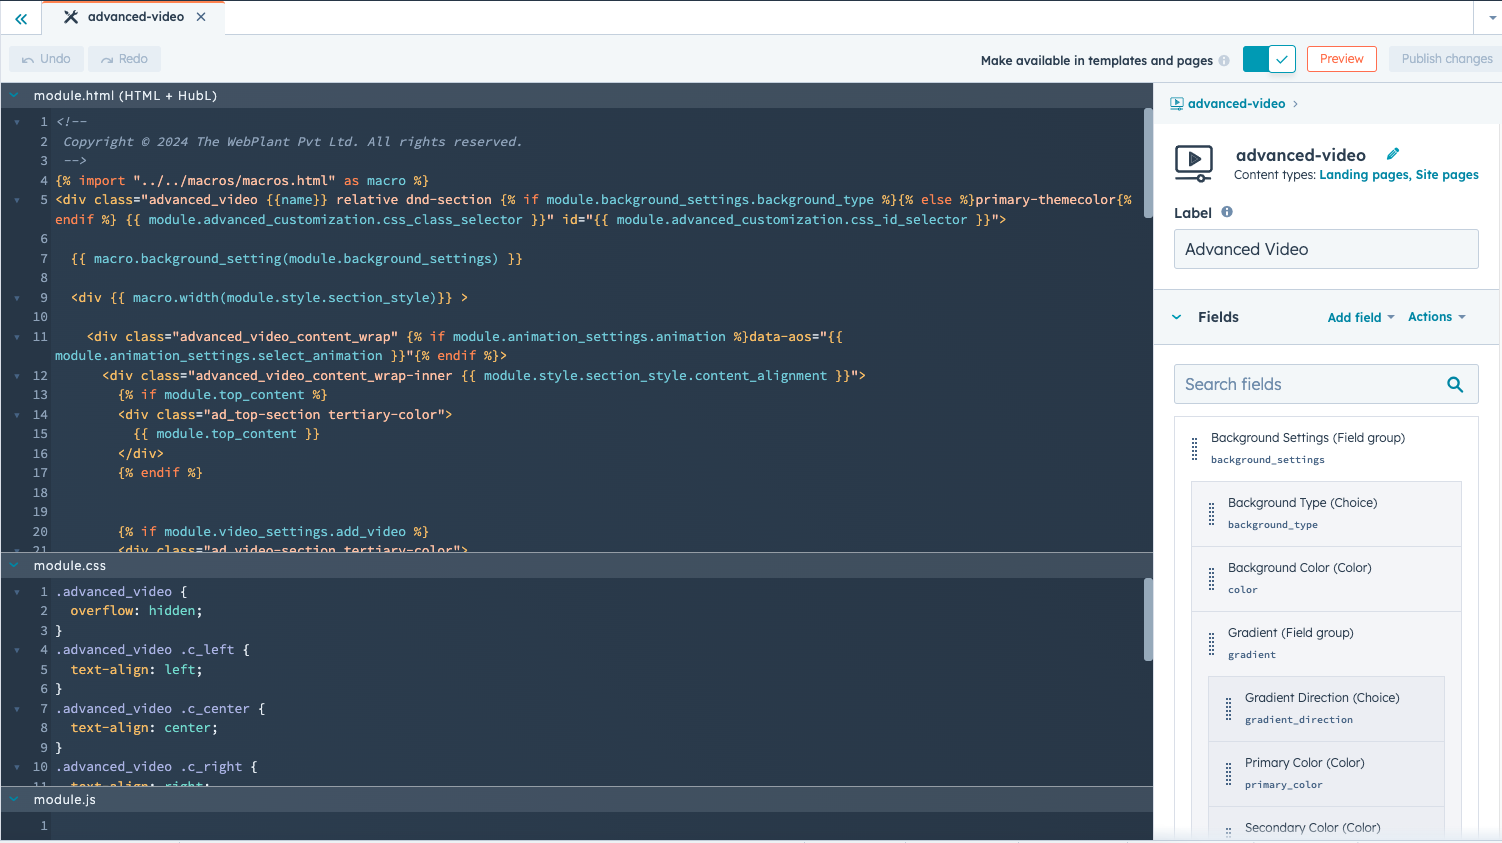
With the CMS boilerplate in your local environment, you'll now create a new module for the theme.
- Log in to your HubSpot account, then navigate to the design manager.
- In the left sidebar of the design manager, open the theme folder that you just uploaded.
- In the theme folder, open the modules folder.
- In the upper left, click File > New file to create a new module in this folder.
- In the dialog box, click the dropdown menu, then select Module, then click Next.

- Select the Pages checkbox to make the module available for website and landing pages.
- Name the module website-header , then click Create.
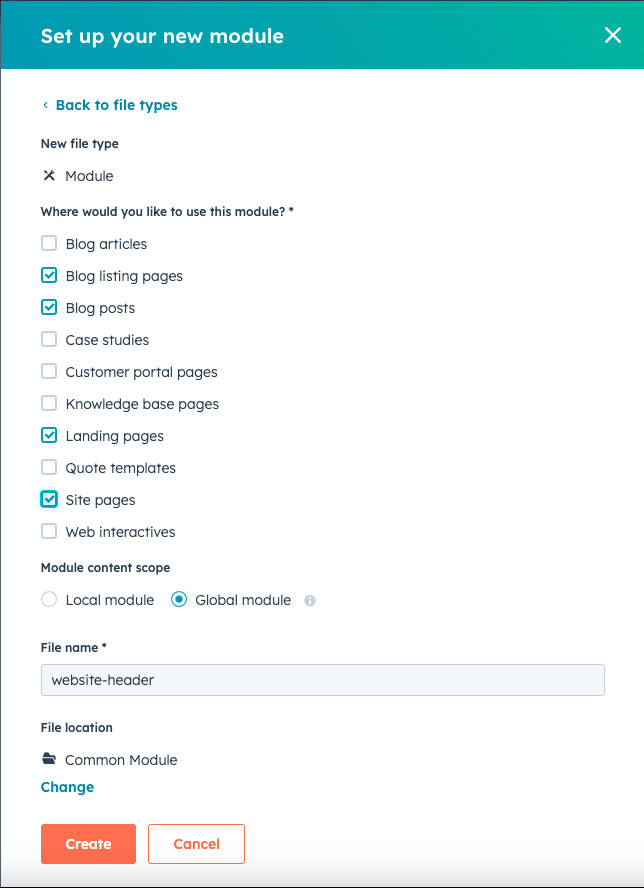
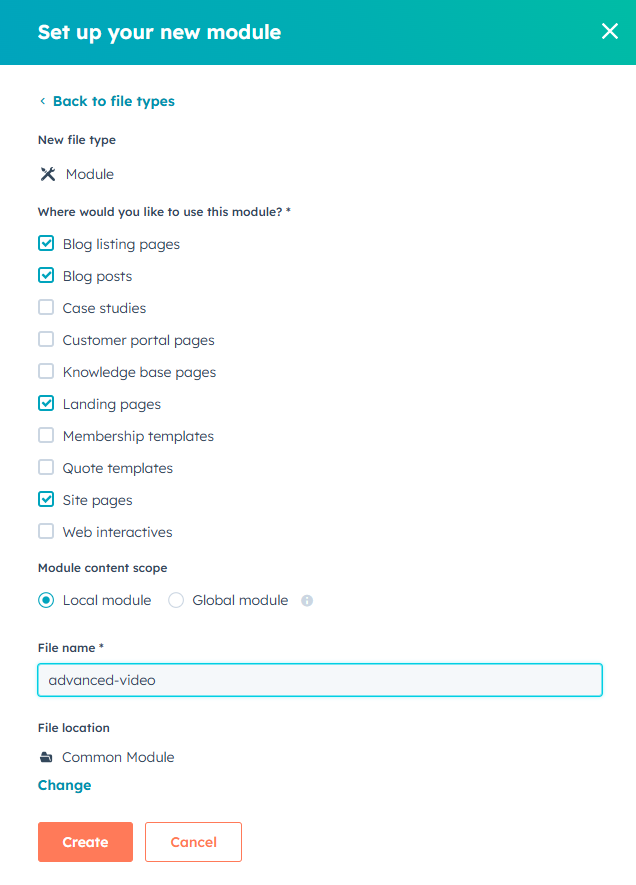
Custom Modules : These are reusable but independent components that can be customized per page.Used for dynamic content such as pricing tables, CTA sections, and testimonials.Users can place multiple testimonial modules on different pages, each with unique content.
Step 4: Uploading and Testing Your Custom Theme
After developing your theme and modules:
- Upload to HubSpot: Use hs upload my-custom-theme to push your files.
- Apply the Theme to a Page: Go to the HubSpot CMS and create a new page using your custom theme.
- Test Responsiveness: Ensure your theme looks great on all devices.
Step 5: Setting Up Branding in Your Custom Theme
Branding settings ensure consistency across all website pages and make it easy for users to modify brand-related elements without touching the code.
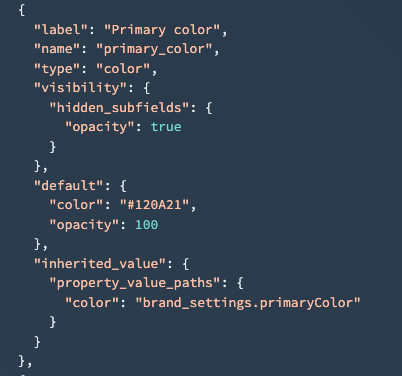
1. Configuring Branding in fields.json
To enable branding controls, update your fields.json file with the necessary fields for logo, colors, and typography:
2. Using Brand Settings for Logo in Your Theme
Instead of manually adding a logo field in fields.json, use the HubSpot Brand Logo dynamically in your theme:
Step 6: Optimizing and Launching Your Custom Theme
To ensure the best performance:
- Optimize Images and Code: Compress images and minify CSS/JS.
- Use HubSpot's SEO Tools: Configure metadata and optimize on-page SEO.
- Monitor Performance: Utilize HubSpot’s analytics tools to track user engagement.
This guide equips you with the essential knowledge and step-by-step instructions to build your own custom theme in HubSpot CMS. By leveraging custom themes and modules, you gain full control over your website’s design, functionality, and branding, ensuring a unique and tailored digital experience.
With the right development environment, structured theme setup, override settings, and branding integration, you can create a professional and scalable HubSpot website that aligns perfectly with your business needs. Whether you're a developer aiming to build dynamic pages or a marketer looking to enhance user engagement, this guide helps you take full advantage of HubSpot’s powerful CMS.
By following these steps, you’re not just building a theme—you’re empowering your business with a custom solution that drives growth and engagement. Now, it’s time to bring your vision to life and launch your custom HubSpot theme!
Step 7: HubSpot Template Marketplace theme requirements
If you plan to submit your theme to the HubSpot Marketplace, ensure it meets these requirements:
Theme Limits
- Maximum: 50 templates, 50 modules, 50 sections
- Minimum: 5 modules, 5 sections
- Exclusions: No email templates, HubDB, serverless functions, or CRM object fields.
Performance Standards (Google Lighthouse Scores)
- Desktop Accessibility: 65+
- Desktop Best Practices: 80+
- Desktop Performance: 70+
- Mobile Performance: 40+
Additional Requirements
- Minify theme files.
- Keep image files under 1MB.
- Ensure all images have alt and loading attributes.
- Use at least five sections with unique and working screenshots.
hs cms lighthouse-score: This command is used to run a Lighthouse audit on a HubSpot CMS website, either on an entire site or specific pages and templates.
Conclusion
By following this guide, you can build a fully customized HubSpot CMS theme and modules that align with your brand’s needs. A well-structured theme enhances user experience, performance, and scalability. Whether you're a developer creating dynamic pages or a marketer focused on engagement, custom themes and modules empower you to maximize HubSpot CMS’s potential.

Related Post

What makes a good HubSpot CMS Theme
HubSpot CMS helps in combining website creation with the power of a CRM platform to enhance & customize the entire buying journey, streamline marketing and sales alignment etc. Users buy CMS Hub to empower their teams to build personalized digital...

Top 5 websites mistakes that are hurting your Business Growth and how to fix them
Online website is more than just an online storefront, it is a key tool to help your business grow. But even a good-looking website can cause problems if certain issues aren’t fixed.

Introducing IGNITE: A New Free Theme for HubSpot CMS
Discover the latest addition to our HubSpot CMS themes collection - IGNITE, a captivating and SEO-optimized free theme that will revolutionize your website.
Power Up Your Project
Request a Quote and Let Us Save the Day!

Leave a reply